Due to COVID-19 many sporting schedules are relegated to almost exclusively no spectator events, coaches are looking for ways to live-stream these events for their fans.
In this blog post, I’ll try to describe an easy to follow process to provide a decent stream.
Things you’ll need…
A computer that is running Windows, Mac, or Linux. Sorry I’m not sure Chromebooks can run the software needed.
2 x USB Webcam ($22 per on Amazon) – One for the match and one for the scoreboard
20ft USB extender ($14 on Amazon) – to get closer to the scoreboard
Initial Steps
Plug the match webcam into your computer and point it towards the game or match
Plug the scoreboard webcam into the USB extender. Get it close to and pointed at the scoreboard
Plug the other end of the USB extender into your computer
Open the OSB software
Set up the stream sources
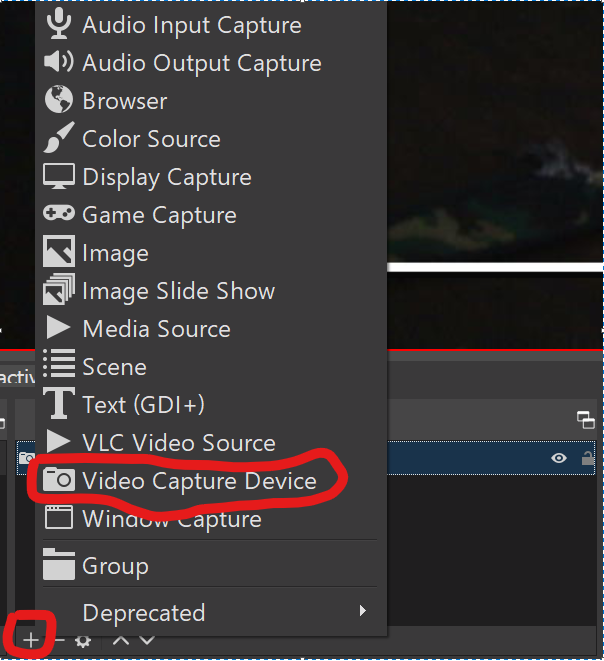
From OBS, find the sources panel at the bottom and click the plus button.
Then click Video Capture Device
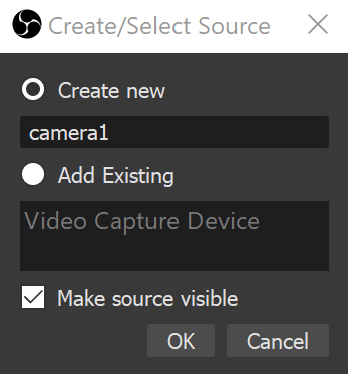
Name it camera1 and click ok
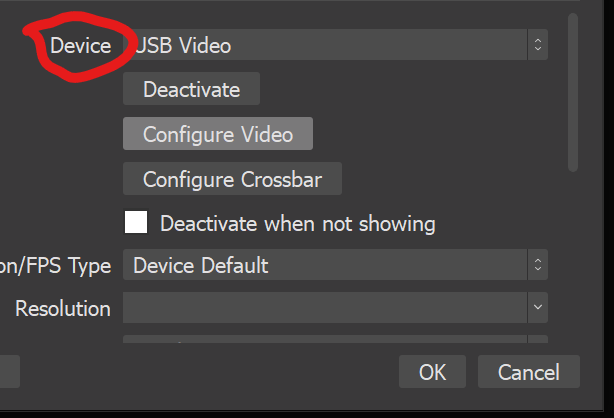
Under Device, choose one of your cameras and click Ok.
Now, follow the same steps for your second camera and name it camera2.
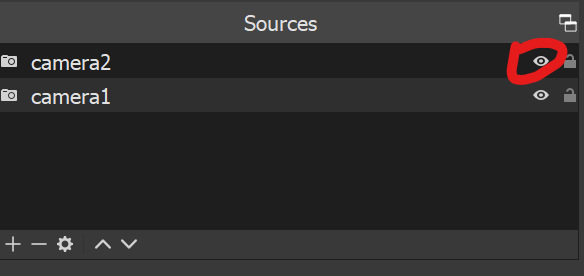
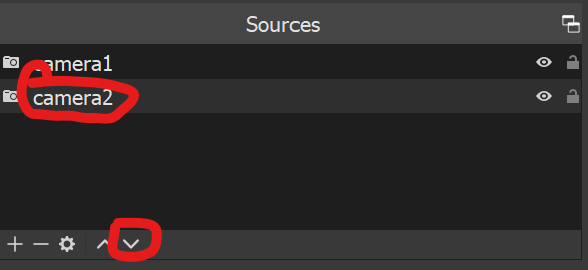
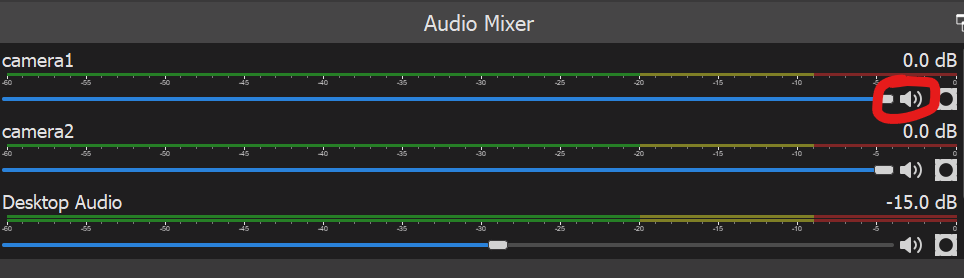
Under sources you should have something like this:
You can click the eye button circled above to disable one camera at a time. Using that eye button, find out which camera is your “match camera” (the camera pointed at the mat). Click the name of that camera, and click the “down” button at the bottom of sources to move that camera to the back of the scene. In my example, camera2 is my “match camera” and needs to be on the bottom.
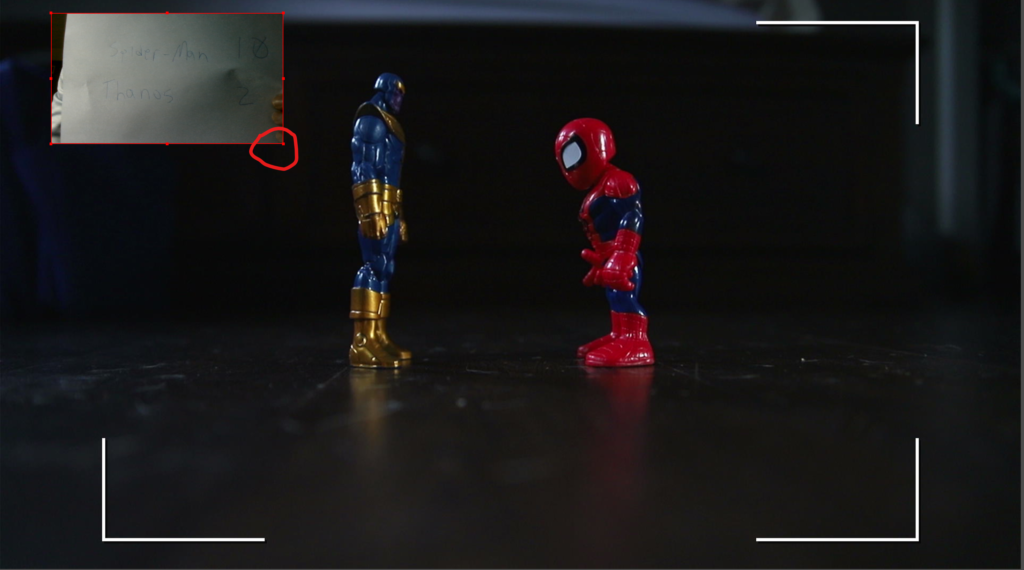
Now, select camera1 and resize it to a smaller size, then click and drag it to the corner of the screen. In my example here, you can see me live-streaming the ultimate match between Spider-Man and Thanos.
Now, with your cameras set up, you can hook OBS up to a live stream service like Facebook or Youtube.
Share the stream via Facebook Live-stream
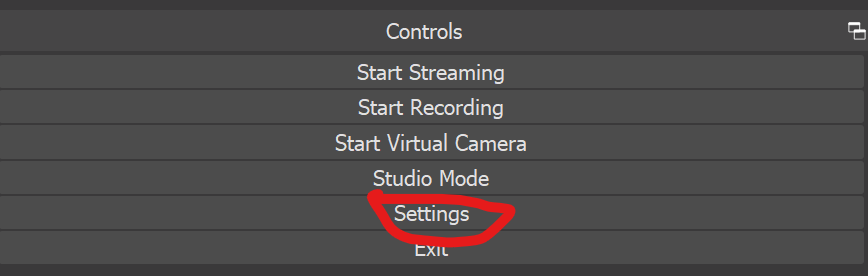
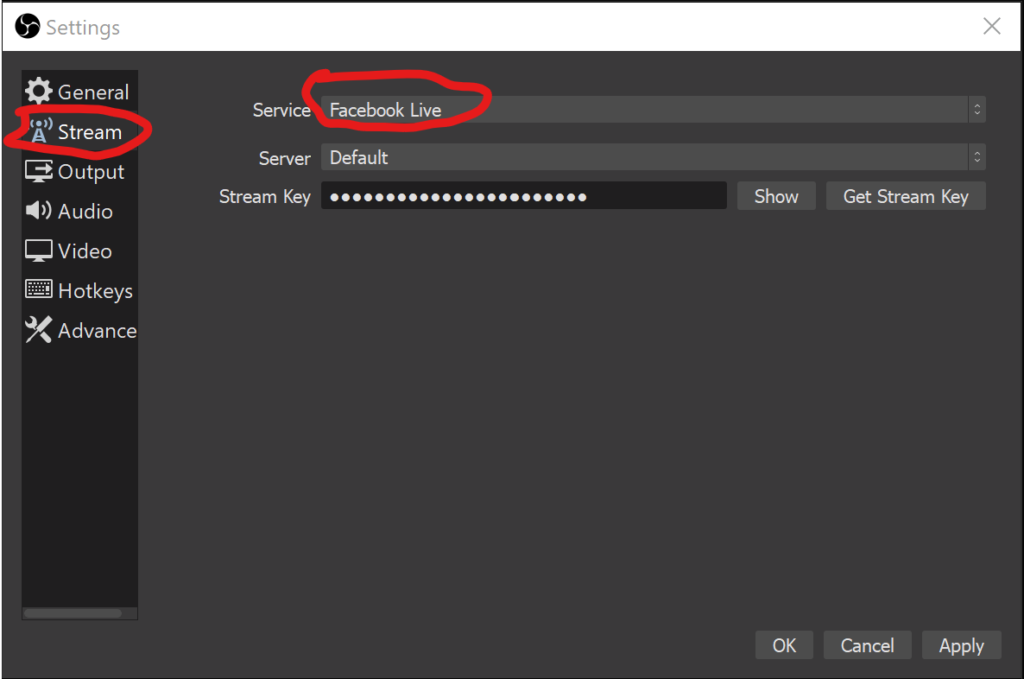
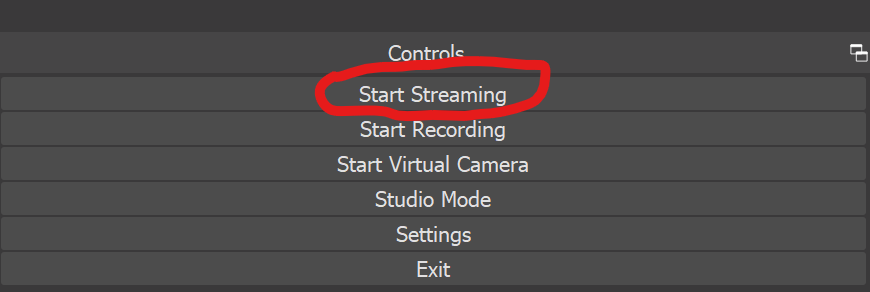
Now, on the bottom right, click Settings, then Stream and select Facebook Live
From here, you can click get stream key and it will take you to the facebook streaming page where you can copy a stream key and paste it into these settings.
After applying your stream key, you can click start streaming from the bottom right.
Final Thoughts
Creating a match or game stream with two cameras and a laptop can be pretty easy.
Kids tend to have filthy mouths, so make sure any kid manning a camera knows what they say can be heard on the live-stream or elect to have no sound by muting the cameras.
In this blog post, I’m going to go over how I deploy a multi-cloud Kubernetes cluster. But first, why do this?
I run Openstack at home in my basement. I do not own any UPS nor do I pay for dual internet connections. But, I have a lot of hardware that costs me less that $40/month in electricity. Considering power outages and consumer ISP outages can be devastating to an application I would like to keep running, I’m going to leverage some cheap cloud servers and the power/flexibility of Kubernetes to make sure a power outage does not bring down my application.
I have a Github Repo with all of my example code. Go look at it because I do not plan on putting a ton of code in here. Just enough to solve some non standard problems.
Outline
Install VMs on Openstack at home, Openstack on Ramnode, and Digital Ocean. This will be done with Terraform.
Create a Kubernetes cluster with these VMs. This will be done with RKE and Ansible.
Solve some gotcha problems.
Deploy your app.
Profit.
VPN
How will these instances talk to each other? My homelab is all behind NAT and I doubt it’s good practice to have your pod network running on public networks.
Hey I have an idea! VPN!… Ugh… But now where do I host the VPN server? That’s now a single point of failure…
Enter Zerotier. What is Zerotier? It’s a peer to peer VPN. It requires a central server when nodes first get added to the VPN, but after that all traffic is peer to peer. This means I no longer have to worry about a single point of failure for the VPN.
Installing the VMs with Terraform
In a previous post on Immutable Infrastructure, I suggested using Terraform. Terraform will give us immutability on the VMs and will allow us to easily deploy VMs to multiple platforms at a time.
In this post, I’m not going to go over everything that is involved in creating VMs on multiple platforms. I will however, show you how I’m creating an Ansible inventory file with Terraform.
To deploy Kubernetes, I like using RKE (Rancher Kubernetes Engine). I use Ansible to template out the RKE config. So my flow looks like this:
Terraform -> Does the separate cloud stuff and creates VMs -> Outputs inventory file for Ansible Ansible -> configures basic stuff on VMs -> templates out the RKE config -> runs RKE for you RKE (run locally by Ansible) -> deploys Kubernetes and configures it to use the Zerotier network.
Here is what the RKE config (as an Ansible template) looks like:
The key pieces here, are internal_address being the Zerotier address for the node and up at the top flannel_iface is the Zerotier interface name. internal_address tells the Kubernetes nodes to advertise themselves with the address written. flannel_iface tells Kubernetes to run the flannel pod network over the Zerotier interface.
$ kubectl get nodes
NAME                             STATUS   ROLES               AGE     VERSION
multicloud-digitalocean-master   Ready    controlplane,etcd   2m47s   v1.15.12
multicloud-digitalocean-worker   Ready    worker              2m36s   v1.15.12
multicloud-home-master           Ready    controlplane,etcd   2m49s   v1.15.12
multicloud-home-worker           Ready    worker              2m41s   v1.15.12
multicloud-ramnode-master        Ready    controlplane,etcd   2m45s   v1.15.12
multicloud-ramnode-worker        Ready    worker              2m35s   v1.15.12
We now have 1 master and 1 worker in each cloud. You will always want a master in each cloud to make sure your api layer is HA. Workers are up to you. With my application at home, I deploy more workers at home because VMs at home are “free” and I have capacity. If my home “cloud” goes down, I make sure there are enough resources on the other clouds to handle regular traffic until the home cloud comes back up. Alternatively, I can scale out the other clouds easily with terraform.
Gotchas
There are two gotchas in this setup.
You cannot use cloud block storage. Why? Because Kubernetes defines that storage cluster wide and expects all nodes in the cluster to be able to use that storage. Ramnode and my Home Openstack nodes cannot attach DigitalOcean block storage. This is solved by deploying Longhorn or another in cluster storage like Rook Ceph or whatever you like. My Github Repo uses Longhorn.
What is the entrypoint? Enter Cloudflare (or another DNS provider with an API).
I wrote a quick docker image with a script that can update Cloudflare with my public IP address. You can see that here. I deploy that into a pod that runs on the cluster and updates Cloudflare with the public address.
Now, if a node goes down, the Cloudflare updater will move to another node in the cluster and update Cloudflare to point to its public address!
This trick even works behind a NAT. At home, I have a Public IP -> port 80 and 443 forwarded to haproxy -> haproxy load balanced across my kubernetes workers.
EXTRA OPTIONAL CONFIG: Because I’m using Debian 10, systemd resolvd is a little wonky at times with docker. This is why I added upstream dns servers in the rke config above.
Deploy App
I have temporarily deployed a test app for this Kubernetes cluster to https://helloworld.test.codywimer.com. This is reflected in the Github repo. I don’t plans on leaving it up for very long so I’ve included a screenshot.
Profit/Final Thoughts
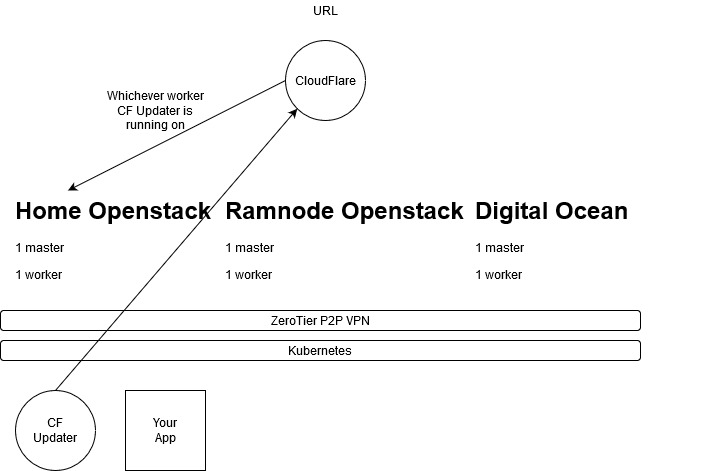
Here is the final diagram for this multi-cloud Kubernetes cluster:
Architecture Diagram
This setup will give you a highly available multi-cloud application deployment platform. At home, it provides me HA. In an enterprise, it can provide you flexibility and the capability to use cheap on-prem infrastructure for normal load and then (with more terraform) provides the ability to scale horizontally up and down with cloud resources.
IMO a hybrid (in house + cloud) approach to infrastructure gives you the best bang for your buck and gives you the most flexibility.
What is normal behavior when a server goes haywire? SSH into it and see what’s going on, right? How do you normally update a server? SSH into it and (on Ubuntu) run sudo apt-get upgrade, right? How do you normally deploy your applications? SSH into your server and run git pull or docker pull, right? That behavior is the behavior of a traditional mutable infrastructure. Mutable meaning these servers change after their original deploy.
What if I told you there’s another paradigm to consider? In the paragraphs ahead, I’ll explain the benefits of immutable infrastructure and give examples of how to implement immutable infrastructure. Immutable meaning servers not changing after they’re deployed. Need to update a server? Deploy a new one. Need to deploy your code? Deploy a new server. Need to fix a server? Nope, shoot it in the head and deploy a new one.
Benefits of Immutable Infrastructure
The biggest benefit to immutable infrastructure is infrastructure as code. In order to be capable of always deploying a new server, you’ll be forced to automate and you’ll be forced to continue automating. Other benefits include:
Forcing you to aggregate all logging information (you can’t retrieve logs from a dead server)
No more configuration drift. You’ll no longer have differences between servers that are alike because 1. they don’t change after being deployed and 2. they’re being deployed with the same automation.
No more snowflake servers. No more servers that only Joe Blow, who used to be on your team but is now on another team, knows how to configure.
Troubleshooting becomes easier. Delete the server and deploy a new one. Your servers are no longer pets. They’re cattle.
The ability to test new server configurations before they’re deployed via staging environments.
The ability to quickly roll back to a known working state if a new server update breaks things.
Tools of the Trade
The number 1 thing that is needed for immutable infrastructure is “cloud” infrastructure. Wait, does that mean I have to pay for the cloud in order to have immutable infrastructure? No, on-prem you can use a number of VM technologies or you can use Kubernetes (sigh, yes you’re not escaping this post without me talking about this cult revolution). On-prem VM solutions that all have an API for deploying servers include Openstack, VMware, and Proxmox. I use Openstack at work and at home. It can be very daunting at first look, but it’s much easier that perceived. I will expand on that more in a future blog post.
Alternatively, you can use public clouds too. AWS, GCP, Azure, OVHcloud, and Digital Ocean to name a few.
Configuration Management
Now that you can easily deploy servers, it’s time to talk about automation to configure them.
Everyone starts this conversation off by ignoring user-data. If your VM platform supports it (Openstack, AWS, GCP, OVHcloud, or Digital Ocean to name a few), user-data is a script that can be passed to your VM provisioner that will run as soon as the VM boots. You can technically automate your entire infrastructure with user-data and Docker. I recommend doing initial configuration with this before moving on to something more complicated like I’m going to suggest below.
Other common configuration management tools include Chef, Puppet, SaltStack, and Ansible. Nothing against the others, they’re fine tools if you design your code properly, but I recommend Ansible. 1. because it’s a push model. You push Ansible configuration to a server instead of a server pulling it and 2. because it’s agentless. You do not need a long running “master” that servers pull from and you do not need an agent on the servers to pull from the “master”.
Simple Immutable Infrastructure
Again, user-data combined with Docker can be very powerful. I recommend the following:
Create a user-data script for each “role” of server in your environment.
Package applications for each “role” into Docker images.
Your user-data script will handle installing Docker and running the Docker image for that role.
Use a tool like Terraform or use Bash to deploy all of your instances with the user-data script passed to it. Terraform can be beneficial over Bash in the fact that it is written to be immutable. If it senses configuration change for a server (like a new network added or a change in image), it will handle deleting that server and replacing it for you with a new one.
Ansible can be used after the server is deployed for any extra configuration. Normally, this is needed for things like loadbalancers that need to know about other servers in the environment (like your app servers).
Profit
Enter Kubernetes
Yes, another blog post talking about the Cult that is Kubernetes. Why am I talking about Kubernetes in a post about immutable infrastructure? Because Kubernetes deployments are actually immutable.
Kubernetes operates with a master/worker paradigm. You apply yaml definitions to tell Kubernetes the state you want your infrastructure to look like, and the masters spread Docker containers out to the workers to create that state. If a worker goes down, the master notices and spreads new containers out to other workers without your intervention. You can then kill off the worker that went down, create a new worker, and add it to the Kubernetes cluster.
Within the past year I have actually moved away from the “simple immutable infrastructure” model above and moved to Kubernetes. Why? Because the model above just pushes Docker images around. Kubernetes was written to do just that and it’s yaml deployment definitions are much more portable if you want to switch cloud providers or even use a different provider as fail over site. Instead of rewriting step 4 for a different cloud, you can just apply your already written yaml to a new Kubernetes cluster in a different cloud.
Every major cloud provider that provides support for user-data also provides Kubernetes as a service if you do not want to deploy it yourself. Openstack, AWS, GCP, Azure, and Digital Ocean to name a few. There are also plenty of on-prem deployment options. One I highly recommend is Rancher.
If you know nothing about Kubernetes, you can get up to speed by reading a great book called Kubernetes Up and Running. This book goes over deploying a simple cluster on-prem and all of the API pieces that help you deploy your apps onto Kubernetes.
Final Thoughts
Infrastructure is not something you want changing out from underneath you while it’s running live. Creating immutable infrastructure simplifies troubleshooting in many ways, allows you opportunities to test your infrastructure before putting it in place, forces good practice like infrastructure as code, automation, and aggregated logging, and also allows you to more easily roll back to a previous state if need be.
Making great coffee at home can be easy and can be affordable (less than $100 for tools). I really love Americano’s (also known as a Long Black). My local coffee shop sells a small Americano for $3. An Americano is just a double shot of espresso with hot water on top and at home can be made for around $0.35 per small cup, saving you $2.65 per cup and giving you much more flexibility with all of the beans choices out there.
With some added equipment, setup can also be used to make latte drinks.
Note on Espresso
What we’re making isn’t exactly espresso. Espresso is made with a fine bean grind and 6-8 bars of pressure (over 600 lbs of pressure). Real espresso is very costly to make (beginner machines costing more than $500 and beginner grinders costing more than $300) and requires much more precision when measuring beans and grind sizes.
We will be making a very strong coffee concentration that is cheaper to make and is much more forgiving if you’re lax on timing and grind size. Unless you’re an espresso snob, you won’t notice the difference and it will still taste better than your local Starbucks espresso.
If you like milk based drinks like lattes, here is an automatic milk frother for $40. Combining that with a sweetener like stevia and flavor syrup like chocolate, you can make lattes.
I highly recommend Coastal Blend by Coastal Coffee Roasters. They sell 5 lbs of whole bean coffee for $55. 5 lbs in grams is 2267.96 divided by 14 (14 g per cup for the recipe below) = 161 cups. $55 divided by 161 cups = $0.34 per cup.
Prep
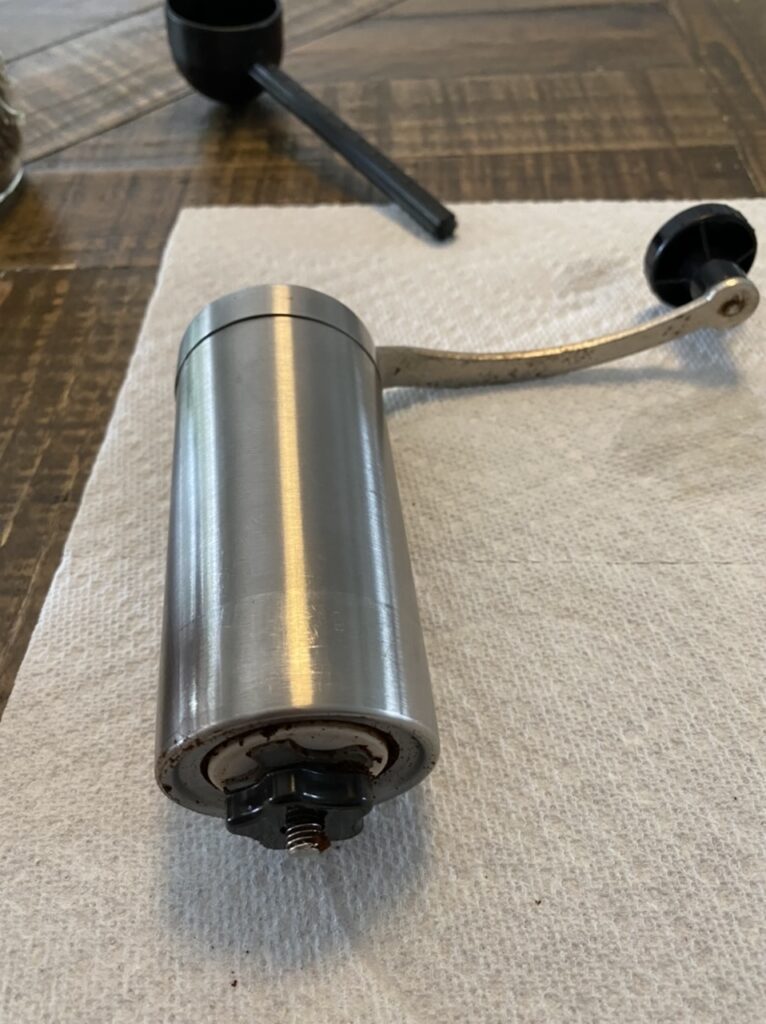
The only prep to do is to set your grinder to a “medium fine” grind setting.
For the Javapresse, put the grind handle in place and hold it while tightening the black grind adjuster all the way clockwise. Don’t overtighten the knob, just tighten until it feels like you’re all the way down. Now, loosen the knob counterclockwise a total of 6 “clicks”.
French Press, Cold Brew, Percolator, Coffee Cupping
Medium Coarse
10-12
Chemex, Drip Coffee Makers, Vacuum Pots
Medium
7-9
Pour Over Brewers (Including Ours), Aeropress
Medium Fine
4-6
Moka Pots, Pour Over Brewers, Aeropress
Fine
1-3
Espresso, Turkish
Steps
Step 1: Grind your coffeeand boil your water
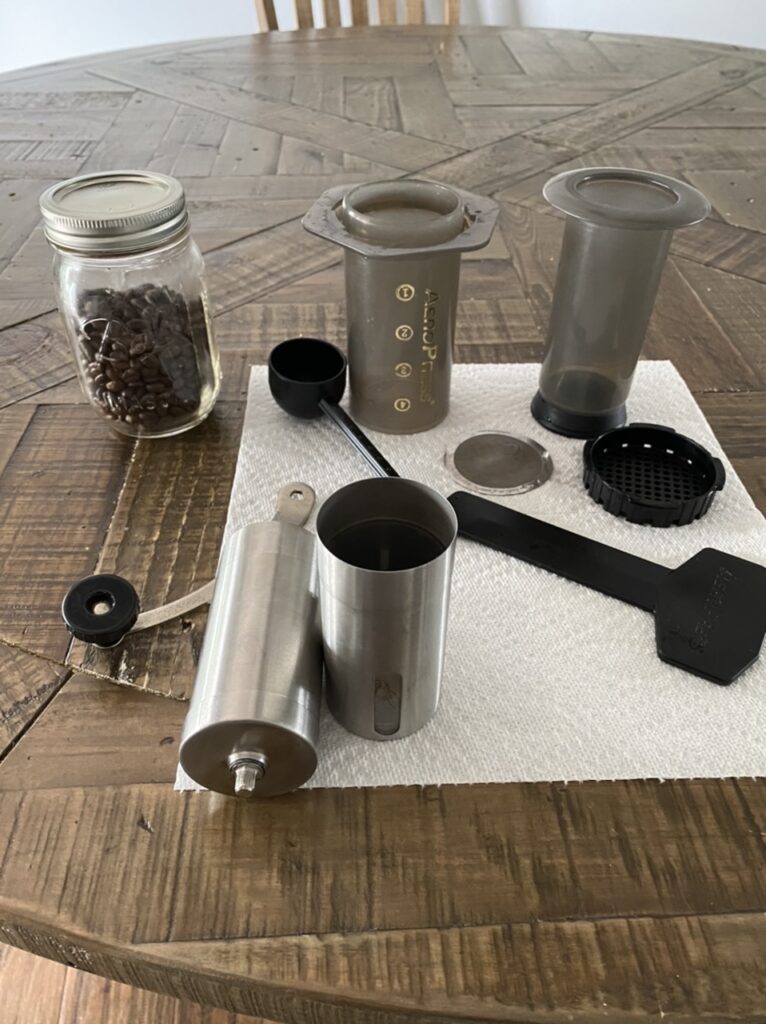
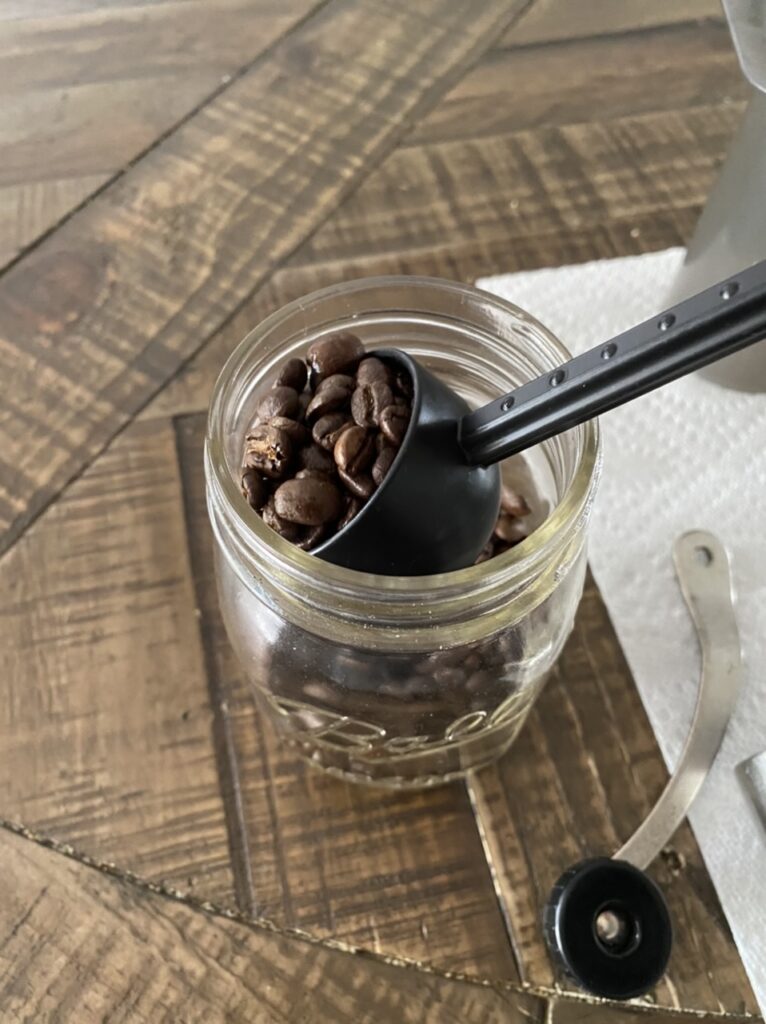
Using the Aeropress provided scooper put 1 rounded scoop (around 14g of beans) into your grinder.
At the same time start boiling water in your kettle.
Scooping beans into the Javapresse hand grinder for use in the Aeropress.
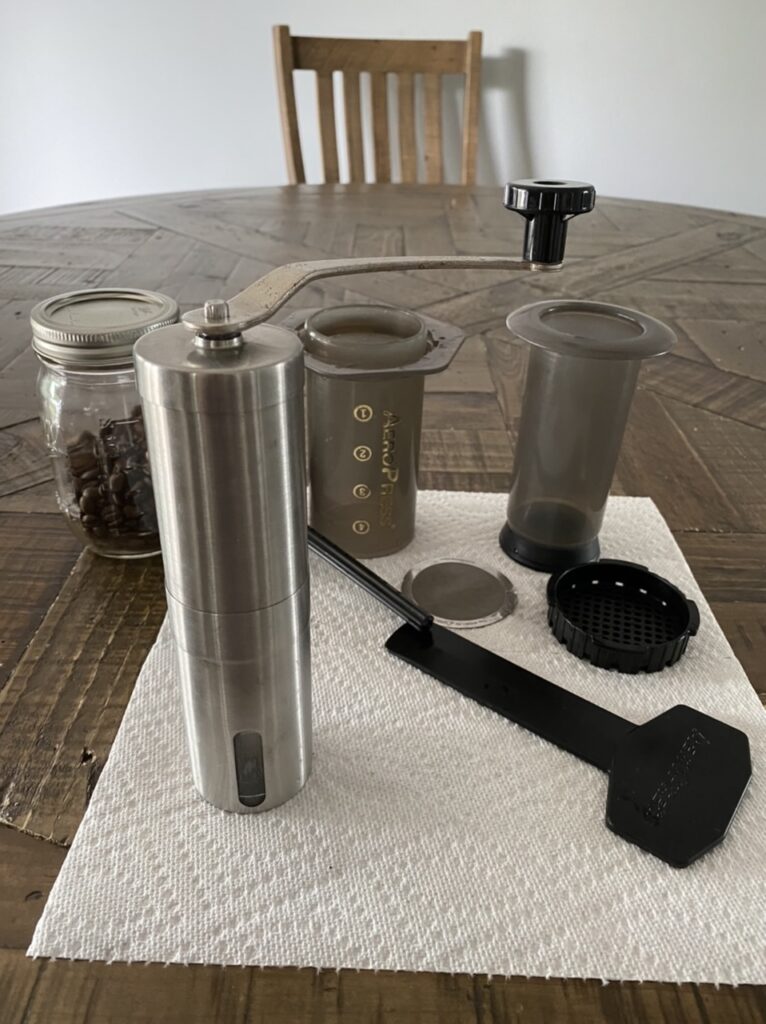
Then put the handle on your grinder and grind. This takes me around 5 minutes while also pissing around letting the dogs in and out 6 times and telling my 1 year old daughter no when she tries getting into the cabinets.
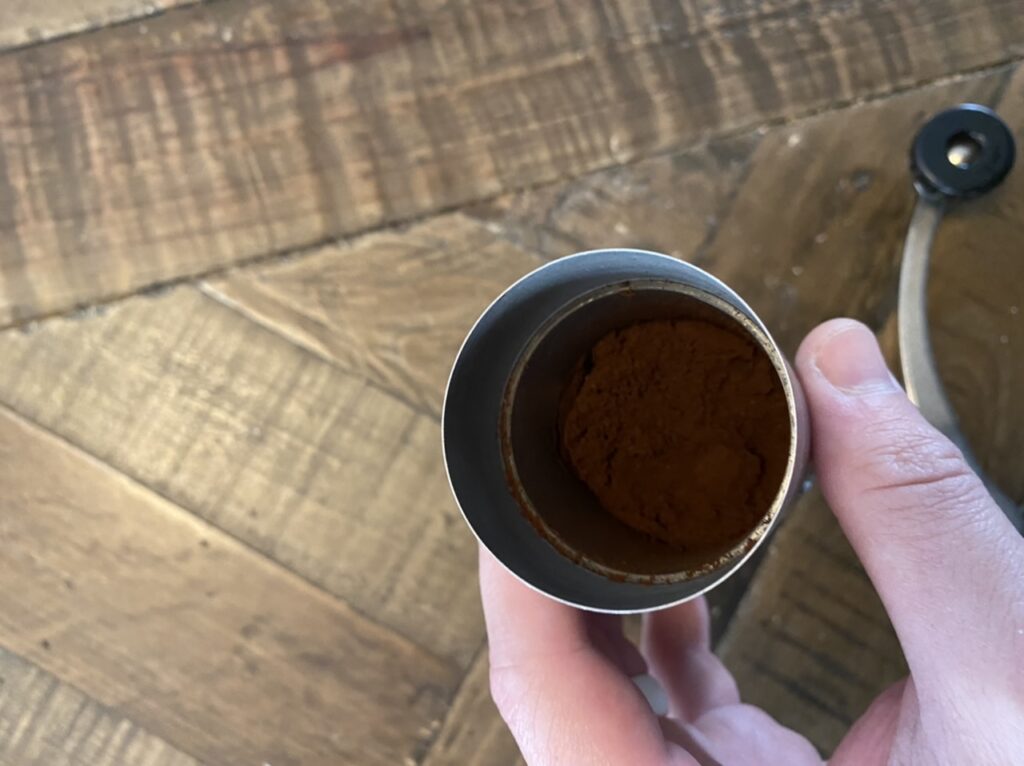
Javapresse with the handle on and beans inside ready to grind.Javapresse final coffee grind.
Step 2: Brew the coffee
I use the “inverted method” when using the Aeropress. Take the cap off and the metal screen out of the Aeropress. Pull the plunger down to 1.5. Flip the Aeropress over ready to add your grounds.
Aeropress ready with plunger down in inverted style.
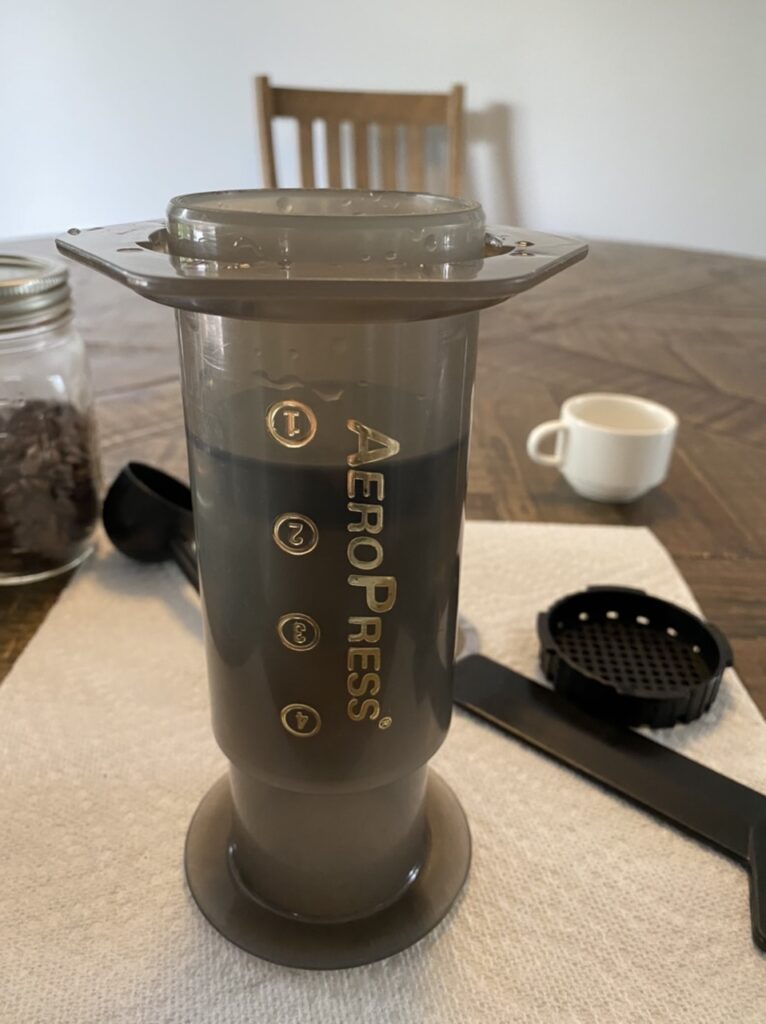
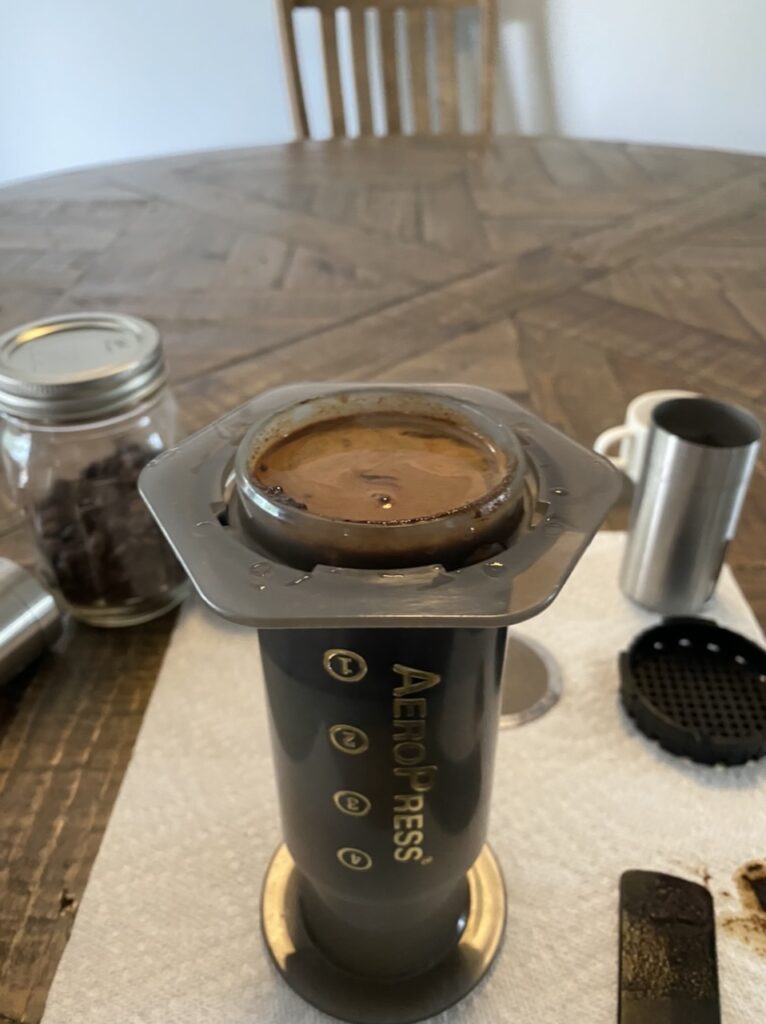
Add your grounds and fill with your hot water leaving a tad bit of room at the top.
Coffee ground and hot water added to Aeropress.
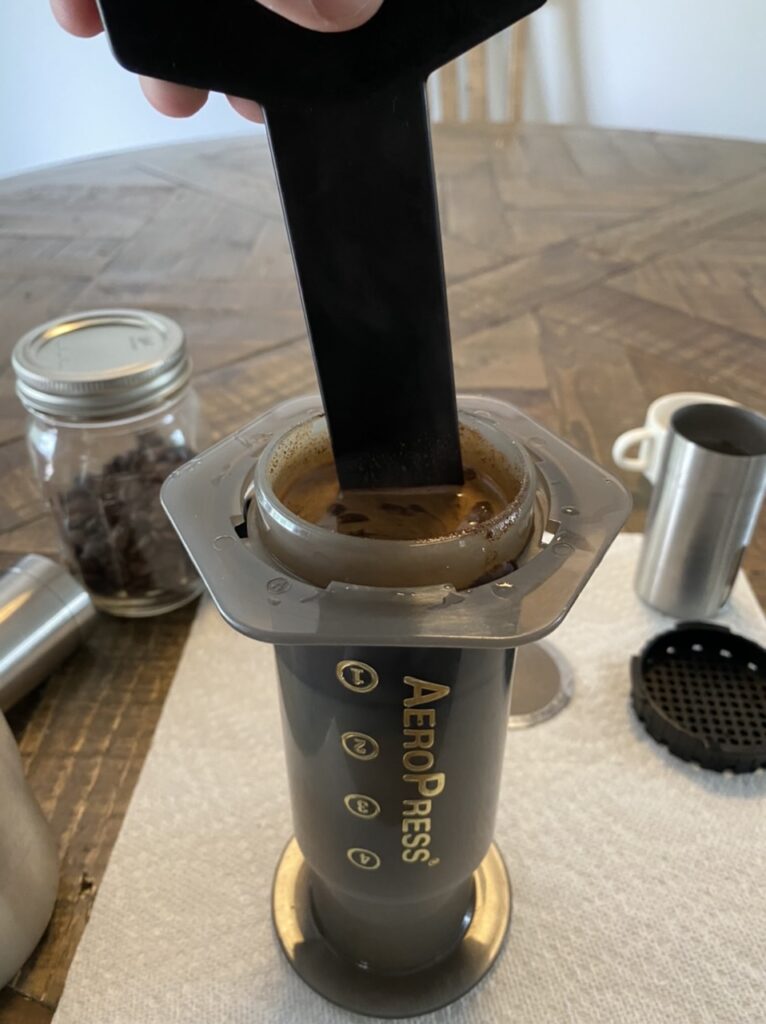
Once the water is filled start a timer. While the timer is running, carefully stir (making sure it doesn’t spill over) with the Aeropress provided stir stick.
Carefully stirring grounds while timer is running for 30 seconds.
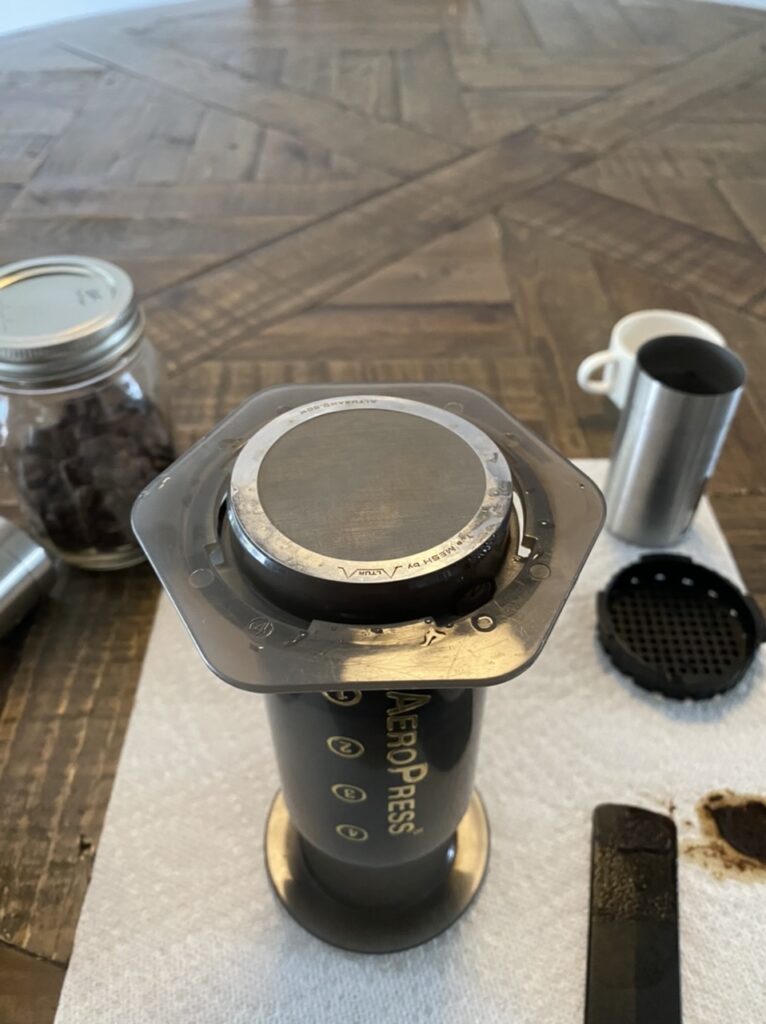
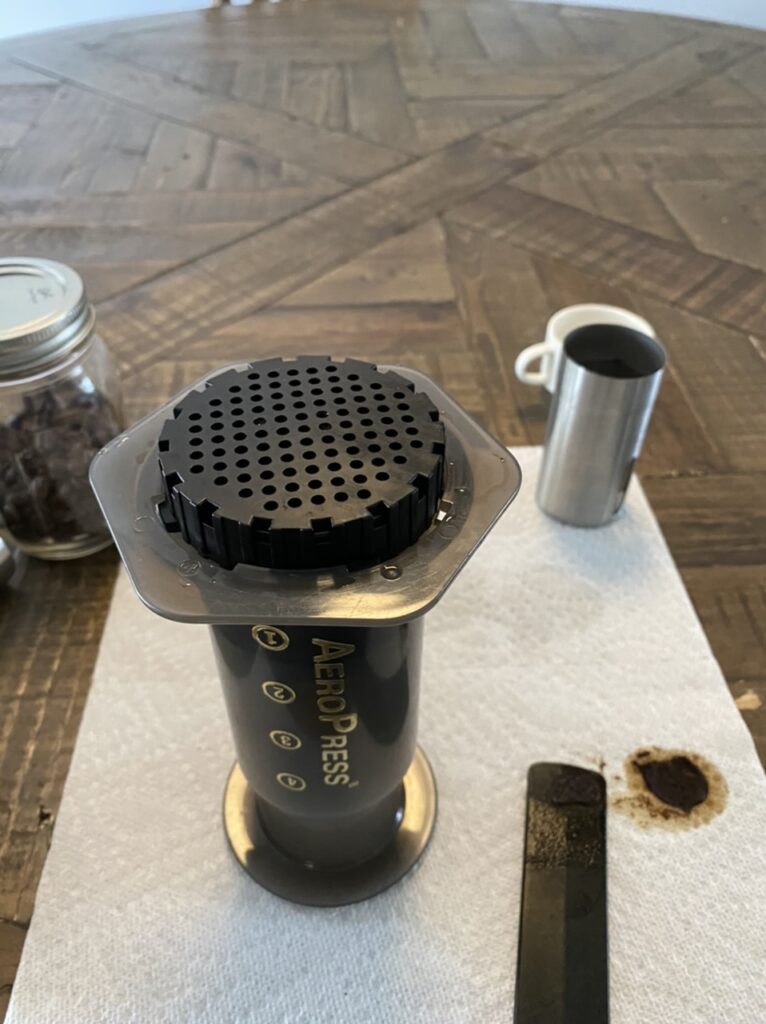
Once your timer hits 30 seconds, place your stir stick to the side, place the metal screen on top, and carefully twist on the cap being sure not to spill the coffee.
Metal filter on Aeropress.Cap on Aerorpress ready to plunge.
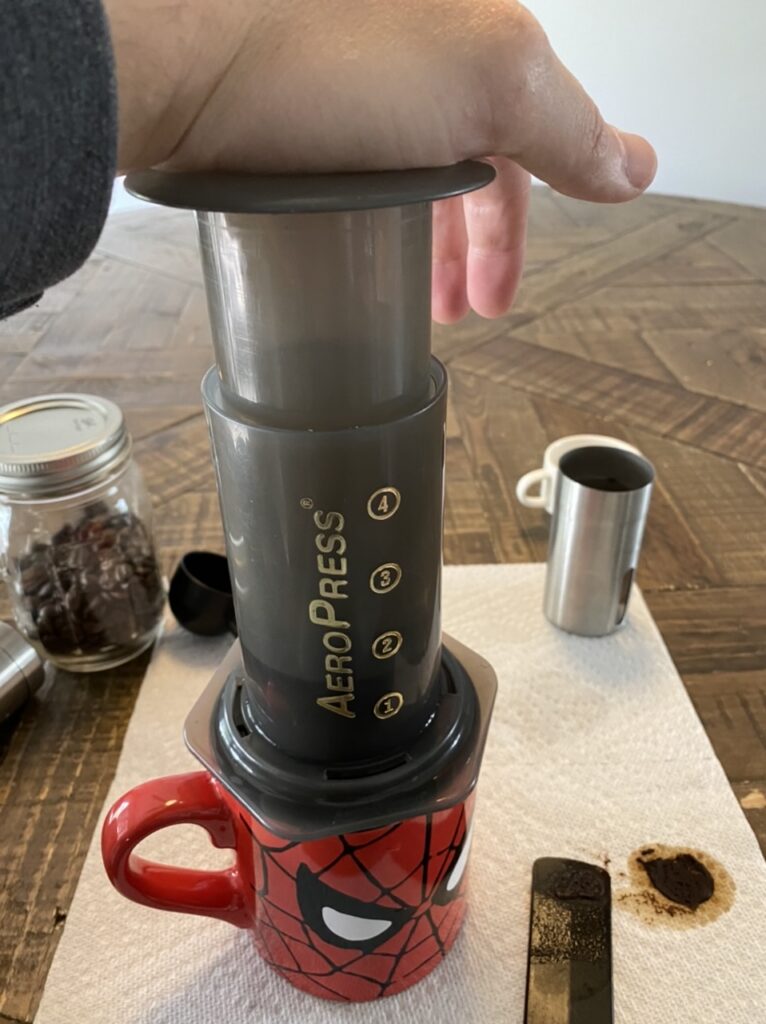
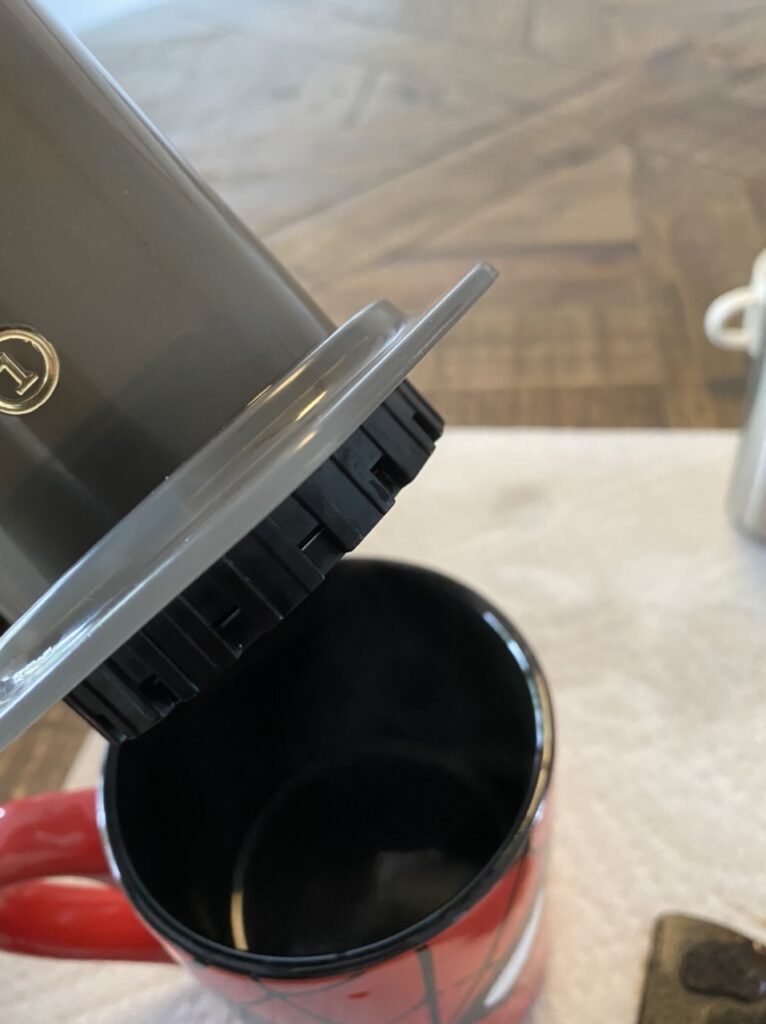
Now carefully flip the Aeropress over on top of your cup and press down hard and fast. Don’t go too hard and fast that you flip your cup and make a mess.
Plunging Aeropress.Final product.
Once it’s pressed all the way down, you’re done! Carefully lift the Aeropress off the cup (some coffee will still drip off) and enjoy. You’ve just made a coffee concentrate that simulates a double shot of espresso.
Step 3: Add extra stuff
If you like Americano’s like I do, add hot water on top. If you enjoy lattes, add your frothed milk, sweetener, and syrup (chocolate, caramel, etc) as needed.
Cleanup
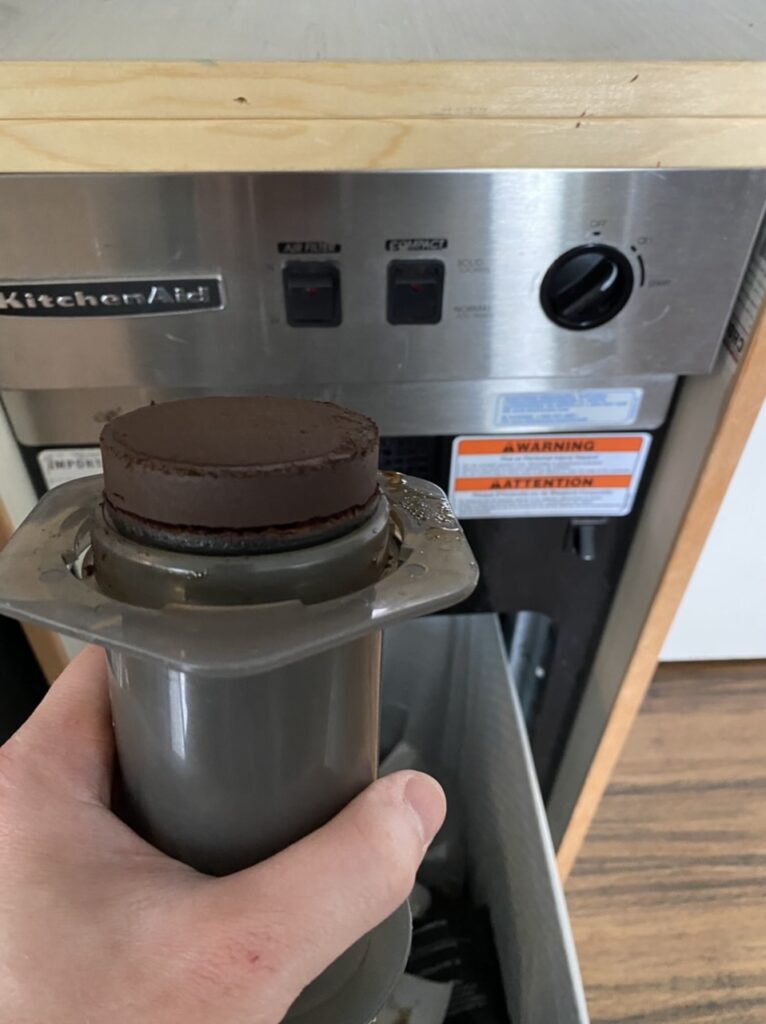
Cleanup with the Aeropress is very easy. Take the cap off and remove the metal filter, push your “coffee puck” into the trash can, and rinse the Aeropress off in the sink with water. DO NOT put the coffee puck down the sink. You will likely clog your pipes.
Coffee puck going into the trash.
Final Thoughts
This whole process takes maybe 10 minutes. If you consider the time you spend getting in the car, driving to the coffee shop, and sitting in line, 10 minutes does not seem too bad.
You don’t have to be a barista to make good coffee at home. Coffee at home can also be better and cheaper than from a chain like Starbucks or even from your local coffee shop.
For full transparency, all amazon links are associate links. Meaning, if you click the link and make a purchase, I get a small kickback.
Every male who starts going to the gym quickly learns about the “Bro Split”. Push, Pull, Legs. Right? One day you do like 8 exercises that work your chest and triceps (Push), another day you do like 8 exercises that work your back and biceps (Pull), and the final workout day you do like 8 exercises that work your legs.
Is that adequate? What does that accomplish?
If you’re just trying to look good with your shirt off then the “Bro Split” can definitely do that. Why? Because of Hypertrophy. If you’re an athlete, you might not be getting the most out of a “Bro Split”.
In layman’s terms, hypertrophy means growth. Training that focuses on hypertrophy is focused for muscle size (think bodybuilders or gym bros trying to look good with their shirt off).
But what about pure strength?
Hypertrophy Training vs Strength Training
The biggest differentiating factor in strength training types is the intensity at with they’re preformed, the number of reps, and the amount of rest between sets.
Training Type
Intensity
Reps
Rest
Hypertrophy
Medium
Medium (8-10)
Medium (1-3 min)
Strength
High (heavier weight)
Low (4-6)
High (3-5 min)
Muscle Endurance
Low (lower weight)
High ( > 10)
Low
Pure Strength for Beginners
There are a number of programs out there for beginners to build strength. The two most popular are very similar in the following manner:
Both have an A workout and a B workout that you alternate every workout.
Both recommend working out 3 days a week with at least 1 day of rest in between.
Both use Linear Progression for advancement.
Start with lower weights to get your form correct.
Add a little bit of weight each workout to each lift.
If you fail on a lift do a de-load.
Lower the weight a couple steps back the next time you do that exercise.
Continue back with adding a little bit of weight each time.
Both have you squat every workout day.
Both choose exercises that are “functional”. Which means they’re exercises that activate your whole body including your core.
StrongLifts 5×5
A free program with tons of information on their website: https://stronglifts.com/5×5/. All exercises are 5 sets of 5 reps except deadlift which is 1 set of 5 reps.
Workout A
Squat 5×5
Bench 5×5
Barbell Row 5×5
Workout B
Squat 5×5
Barbell Overhead Press 5×5
Deadlift 1×5
Starting Strength – Mark Rippletoe
Mark Rippletoe wrote a book about this workout that I recommend you buy: Starting Strength. All exercises are 3 sets of 5 reps except deadlift which is 1 set of 5 reps.
Workout A
Squat 3×5
Bench 3×5
Deadlift 1×5
Workout B
Squat 3×5
Barbell Overhead Press 3×5
Power Clean 3×5
Final Thoughts
It will take a long time to advance past these “beginner” strength training routines. If you’re looking to add strength in an off-season, I highly recommend using a barbell and lifting heavy.
In a future blog post I will talk about bodyweight strength training vs most muscle endurance training you see online (100 push-ups a day etc).
Happy lifting!
Jacob Cody Wimer
Update
I have updated this blog post to include an Amazon Associate link to the book Starting Strength.